Episodes
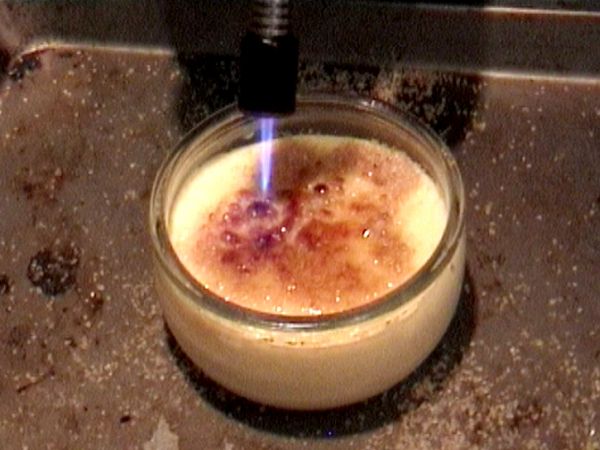
First Episode: The Perfect Steak

We learn the science of the perfect steak - and how to cook it using a home vacuum cleaner and a blowtorch.
The Fife Diet - Part 1
 ]
]
Locally-sourced foods: saviour of the planet or big hippie fad? We attempt a week on the “Fife Diet”, eating only foods from the Scottish county of Fife, to find out. Part 1: to Fife!
The Fife Diet - Part 2

Locally-sourced foods: saviour of the planet or big hippie fad? We attempt a week on the “Fife Diet”, eating only foods from the Scottish county of Fife, to find out. Part 1: to Fife!
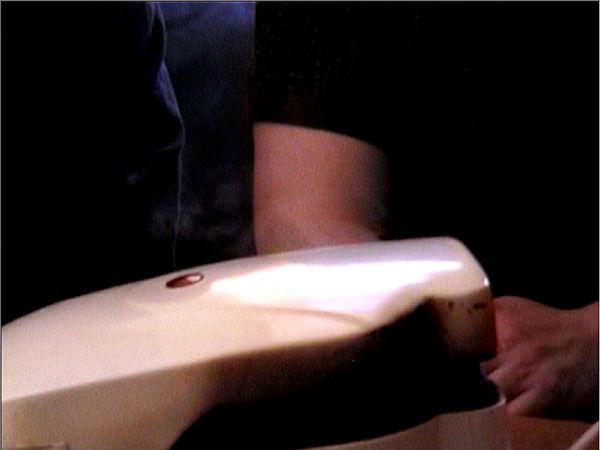
Blowtorches!
Are kitchen blowtorches highly specialised kitchen tools, or useless substitutes for a real blowtorch? We pit a kitchen blowtorch against a plumber’s blowtorch … against a hairdryer.
Mythbusting: Herbal Teas

Alex doesn’t believe that Camomile, Ginkgo or Valarian herbal teas work. So he’s testing them, with the aid of Guitar Hero, World of Warcraft, and a LOT of tea…
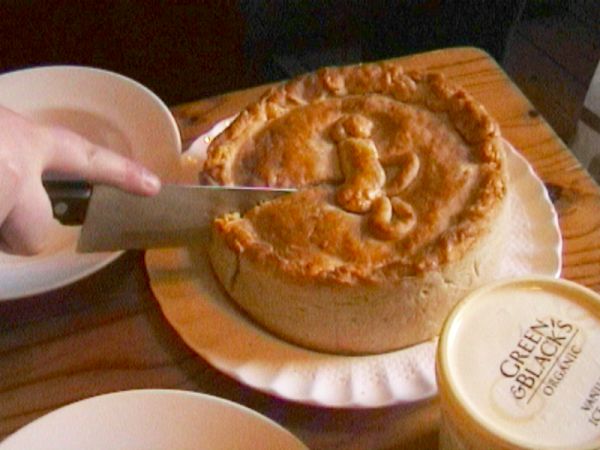
Normal Person vs … Gordon Ramsay
Can geek Johnnie cook Gordon f—ing Ramsay’s Brussel f—ing sprout souffle? We put the sweariest of all celeb chefs to the test.
Health Grills
We test a Health Grill. Scientifically. No, wait, that’s not right. Sureallistically. That’s it.
Mythbusting: Preheating Ovens

We investigate cooking myths - do you really need to preheat your oven or is it just a waste of energy?
Normal Person vs … Nigella Lawson
Normal People test celebrity chef recipes once again, as Alex takes on Nigella’s Double Apple Pie. Will it be scrumptious or scary?
Digital Thermometers - tested!
Digital Thermometers - total cooking revolution or big techie waste of time? Hugh attempts to convert the others to the Joy of Probes…
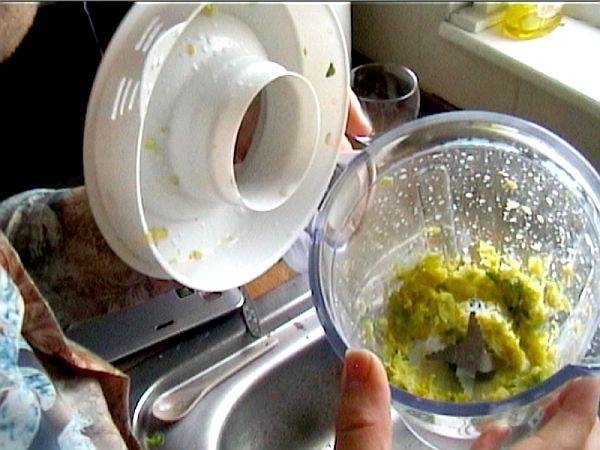
Blenders!

Will it blend? Or will it just splash FAIL around our kitchen? Kamikaze Cookery tests three stick blenders, investigates the wonderful world of soups and foams, and more.
Normal Person Vs… Jamie Oliver

We’re on a mission - to see whether celebrity chef recipes are any use to normal people. This week - Paul, Jamie Oliver, and a lot of pasta dough…
Mini-Episode: More Sous-Vide

Following on from The Perfect Steak, Hugh talks about other things we can cook sous-vide.
The Perfect Steak
We learn the science of the perfect steak - and how to cook it using a home vacuum cleaner and a blowtorch.
I see BoingBoing’s picked up on the exciting stuff you can do with pressure, extraction, marinades and so on.
(For a summary, check the Khymos post of a few weeks ago).
Of course, KKC ain’t far behind! I’ve been doing some tests with extraction, and will be doing some marinade tests as soon as I have some chicken or other marinadable meat to hand. Expect a post soon.
(Initial results: garlic-infused oil WIN. Coffee-infused Glenmorangie FAIL. Other results in need of more testing.)
Read more →
When I first heard of the idea of boiling chicken, I was pretty aghast. I mean, grilled chicken, abso-bloody-lutely, pan fry, sure - gorgeous chicken here we come. Steamed chicken breast isn’t very interesting, but it’s very nutritious. But boiling chicken? I envisoned something dull, tough, flavourless, and with all the nutrients swimming around in the pan.
But actually, there are a few reasons why you might want to boil chicken, or at least do something approximating to boiling it.
h2. If you need to do something with cheap chicken legs
Chicken is one of my favourite foods on earth, but more than any other meat, it really depends on how well the animal was grown. Linda Dick grass-fed free-range birds have a beautiful flavour with nothing done to them. But cheap-ass bottom-of-the-supermarket battery-farmed chicken? Ugh. It’s a bit like eating slightly off tofu.
Still, I’ve been poor a fair few times, and during one of them I figured that boiling chicken thighs - well, not boiling them exactly, more poaching them - was about the only way to make them palatable.
Make up a fairly flavourful stock - you can do this pretty cheaply with a couple of cut onions, carrots, and a fairly serious amount of vegetable stock cubes and some wine vinegar or ideally wine (you can use off wine from a couple of days ago). Immerse your cheap thighs in it, and heat the entire thing until it’s just bubbling. Now leave it to go for a few hours.
When you’re done, you’ll have some chicken thighs with actual flavour soaked into them, no matter how rubbish the initial bird was.
h2. If you’re wanting to make a stew or stock
Of course, people always say that you should make a chicken stock with a chicken carcass. That’s great if you happen to have one lying around. But if not, I’ve found that frozen chicken pieces make a fairly acceptable substitute fresh stock.
Fill a great big stock pot with water. Add carrots, celery and onion. Dump half a dozen frozen chicken pieces in there - yeah, I know people say you should defrost them, but frankly if you’re going to boil the darn thing for a couple of hours there’s no bacteria on earth that can survive that (even Bacillus Cereus, infamous for surviving high temperatures, won’t survive more than 20 minutes of boiling). Bring to the boil, then lower to a simmer, and leave to stew for one and a half to two hours. (Ignore people who tell you to cook stocks for eight hours - it IS possible to overcook a stock). Skim the scum that rises to the surface - using this method, you’ll get a lot of it.
When you’re done, you’ll have some great stock, far better than anything you’ll get from a store, and you’ll have loads of extremely well-cooked chicken, which won’t be too flavourful, but will taste OK if it’s shredded and fried (see below).
h2. If you want a low-hassle way to get some shredded chicken
Like I say above, there’s no reason you can’t take frozen chicken straight to boiled chicken that I know of. If you’re wanting some shredded chicken for a stir fry or similar, and you’ve got some chicken in the freezer, just take it out and boil it for a while (at a gentle boil, not a rolling boil), where a while’s about 45 minutes or more - check it to make sure it’s done before you serve, obviously. It’ll be a bit dry and it’s not the best way to cook chicken, but unless you’ve got a sous-vide water bath, it’s probably the most convenient.
Once they’re cooked, just take your bits of chicken out - they should shred really easily, and they’ll be perfectly acceptable deep-fried or used in fried rice.
Read more →
What’s a secret secret? It’s a secret that’s pretty damn secret, that’s what it is. Which is of course what grilled chicken, even easy, easy grilled chicken, is not. Or possibly is.
OK, I’m confused now. Let’s do some tips.
h2. For quick and easy, you first of all want thin
If you’re looking for a quick, easy grilled chicken meal, then you don’t want to try grilling a whole chicken thigh. That way lies pain, illness, and salmonella.
One of the reasons that cooks have such trouble specifying precise cooking times for any kind of meat is that the cooking time doesn’t depend on the weight of the meat - it depends on the thickness of the meat. Essentially, what you’re waiting for is the heat of your cooking appliance, whatever it is, to travel through the meat, which it does fairly slowly per centimeter. Thus, if you want something quick, you want something thin. Thigh fillets are good, or breasts, particularly if you cut them in half vertically.
As a bonus, the thinner the cut, the less chance of your serving it undercooked. Whole thighs are a nightmare to cook on a grill, but a 5-mm thick slice of breast will cook almost instantly, right through.
h2. If nothing else, add lemon
If you don’t have the time, expertise, or enthusiasm to do a complex marinade for your chicken, chicken works really well with lemon. Just squeeze some over in the packet a few minutes before serving, and you’ll be well away.
Garlic is similarly good - crush it and rub it into the chicken, and you’ve got something sophisticated-tasting for very little effort.
Finally, sprigs of thyme on a closed grill, whether a pan or BBQ, can just be shoved under and around the chicken to flavour it and look great too. Thighs will absorb flavour better because of their higher fat content.
h2. Marinades don’t have to be slow.
There are lots of technological ways of marinading chicken in seconds, not hours.
After their rise in popularity a few years ago, vacuum marinators are now cheap and easy to use - stick the chicken and a marinade in there, wait 10 minutes, and you’ve got marinated chicken. Search for them on Amazon.
For something even faster, you’ll need either an ISI cream whipper, or a CO2, erm, poker-pressuriser thingy. (Check out this awesome video on the subject). Slather chicken in marinade, place in pressurisable vessel, pressurise, then suddenly depressurise, and the chicken will take on the marinade super-quickly.
All of which lets you get a 12-hour marinade effect in about a minute.
Any other tips for making grilled chicken easier?
Read more →
So I’ve been writing some long-tail content for KKC recently, aiming to cover various topics around some of our longer blog posts.
Now, these are all little snippets, and I was originally intending to just stick them on the blog quietly and not tell anyone about them until Google found them.
But the more I’ve been writing them, the more they’ve been rather fun. And so I thought you guys might enjoy some of them too!
h3. Kettles
These aren’t full-on KKC madness, so they’re quite short and often quite basic, but hopefully you’ll get some amusement from them anyway!
Oh, and read our infodump on fair trade chocolate facts - it’s IMPORTANT.
Read more →
Kettles - great, but irritatingly loud sometimes. Kettle manufacturers seem to have cottoned onto that fact, and are now advertising more and more quiet electric kettles, with “quiet boil” features and more. But what actually affects the quietness of an electric kettle thing to check is actually not the kettle, but its surroundings. If it’s very loud, it’s probably because the vibrations from the kettle boiling are causing a larger area to vibrate too. Is its base touching any other household items, which might be vibrating in turn? A good trick to quickly quieten it down is to place something soft to damp vibrations from the kettle - try putting it on a dishcloth or teatowel, then boiling your water and seeing how the noise is affected.
If it’s a cordless kettle on a base, a little bit of kitchen towel between the kettle and the base might also damp vibrations nicely.
If you want to go the whole hog and buy a quieter kettle, there are a number of ways manufacturers can make their kettles cheaper. Double-walled kettles, which have a double wall in the same way as a thermos flask or some of the more expensive (and useful) cafetieres, will insulate noise in exactly the same way it insulates heat - in both cases, the design gives a buffer of lower-density air or vaduum between the higher-density metals or plastics, and both air and heat are transmitted by vibrations. In general, a kettle that’s cooler to the touch should also be quieter.
Many kettle reviews complain that so-called quiet kettles aren’t, or that unquiet kettles are. If they’re trying to make the kettle quieter by design of the shape of the element or even the kettle, they’ll be running into very, very complex fluid dynamics problems, which frankly British Aerospace have enough trouble solving. Any solutions at a home applicance level, unless they’re from a very impressive manufacturer (if Dyson makes a quiet kettle, listen up), are likely to be a bit unreliable. Having said that, if you buy a hot water heater-style kettle (read our warnings on those, but they do have some advantages), the totally different way they heat water from a kettle should make them close to silent.
(We do have another piece on how to choose a silent kettle if you’re still determined, though.)
Finally, a lower-powered kettle won’t necessarily be a quieter kettle. No matter how slowly you push energy into the kettle, the molecules still have to reach the same temperature to boil, and that’s still going to involve the same state changes and gas bubbles, which in turn mean vibration. You might be better to buy a more powerful kettle and just make noise for less time!
Read more →
The problem with electric kettles is clearly that they’re a bit staid. Boring. Run of the mill. What you want is a kettle that’s different. A kettle that stands out from the crowd, a kettle that will emphasise your feminine side. But not something stovetop-based, of course. Something actually practical. A pink electric kettle.
Well, it turns out that we ended up doing some research around here for our tips on electric kettles, and in the course of that, we found out that such things exist.
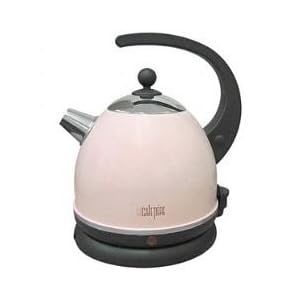 The first name that leaps out of Google when you look for a pink kettle is La Cafetiere, best known for frankly rather overpriced french presses. (Although any cafetiere is a bargain compared to most other ways of making coffee)
The La Cafetiere kettle looks lovely - it really does, even someone who’s decidedly out of the target market like me would admire the smooth, understated looks. Unfortunately, that’s where the good news ends. According to users, it’s not a picnic in the kitchen at all. There’s no water level indicator, you can’t fill it through the spout, and the lid tends to get extremely stuck. If you’ve absolutely got to have the best design, go for this one, but otherwise, I’d say avoid.
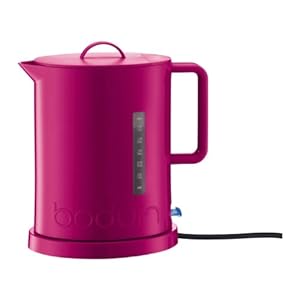
If you really want the most pink you can possibly get, a Bodum kettle may be the way forward - specifically the IBIS pink. The design’s kinda blocky and ugly, and the reviews are decent but not outstanding, with users not complaining but not singing its praises either. But it’s really, really electric pink - and if you want your decor to really put the “electric” in electric tea kettle, there’s really no other choice. (Beware, though - it has no specific rating for its wattage, so whilst it claims a fast boil, that could be twice as long as the Kenwood).
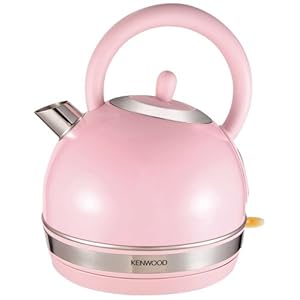 Last but not leaste, the Kenwood Traditional Style Pink Kettle. It’s pretty clear that Kenwood’s designers were aiming straight at “cute” here - it’s almost impossible to resist the urge to start going on about what a “wuvvly cuwte widdle thing” it is. Now, personally, if I wanted cute I’d get a kitten, but in the right kitchen this thing could look brilliant. Users are very happy with it too - it’s very quiet, it’s 3kW for really fast boiling, it’s got a water level indicator to avoid damaging the environment by heating half an ocean every time you want a cuppa.
Overall? Get the Kenwood if you want pink and cute. Get the Bodum if you don’t like the Kenwood. Get the La Cafetiere if you prize design above functionality.
This has been a Kamikaze Cookery Infodump - short bits of useful information from the three geeks. Who cook. With Science.
Read more →
As you may have noticed, I’ve been having a bit of an “appreciate the simple tools” time in my kitchen recently (hence my pean on the electric kettle). In fact, the most recent gadget I bought was a set of digital food scales, accurate to +-1g, for about £8, from Sainsburys - and I really can’t believe I went so long using crappy analogue scales.
They’re the universal solvent of cooking - they make my coffee better, they make my experiments easier, and they make my cruddy measuring jug less necessary.
Give it up for the scales.
h2. Beverages
I bought the scales for coffeemaking, and they haven’t disappointed. As I mentioned in the article on cafetières, accurate scales are absolutely vital for good coffee using a cafetiere or, I suspect, a filter, whether manual or automatic.
It’s not just coffee they’re great for. As we should all know, measuring ground solids by volume is a fairly crappy way to go about things, particularly if the individual grains are large and uneven. You’ll need a microgram scale to get the best results with measuring tea, but if you get one, you can start optimising toward the perfect brew (I really need to do that “A/B testing for food” article soon - sound interesting?). Unfortunately there’s very little info available on exactly how much tea you’ll need per pot, but Wikipedia recommends 2.25g per 180ml for black tea, which means that you can use even a normal scale for a pot of tea for three or more (assuming about 275ml in a mug, you’re looking at 825ml for three people, so make a litre to avoid the dregs, using 12.5 of tea).
Hot chocolate, squash, citron presse, all of these things are vastly variable on volume, and bloody difficult to reliably reproduce using just the regular teaspoon. Did 17g of Green and Blacks’ hot chocolate with 450ml of hot milk produce the Best Chocolate Evar? Now you’ll know.
Which leads me on to…
h2. Repeatability
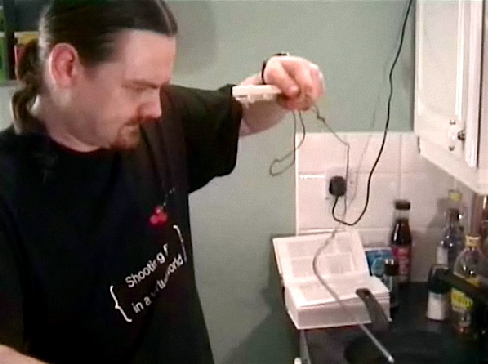
We’re all geeks here, right? I mean, I’m actually sitting typing this wearing an XKCD Science: it works, bitches T-shirt. So we should know by now the value of being able to reproduce our results.
You needs you a good set of scales to do that. And once you’ve got them, you can actually embark on an entirely different sort of cooking, which you may find more or less fun depending on your personal preferences - actually setting up multiple different variations on a dish and seeing what works best. Many cooks might find that unutterably boring, I know, but it has one great advantage that you can actually start adding to the Great Cook’s Canon this way: rather than following along with other cooks and chefs, having vague discussions, you can not only optimise your own dishes, you can tell other people EXACTLY how to produce your results.
h3. Retire the measuring jug
I have a bit of a thing about my measuring jug - I can’t stand it. It’s crappy plastic, it’s hard to read, I have to bend over, squint and guess even to get readings to within 100ml of where I’m aiming.
And then, I realised that an awful lot of the time, what I’m measuring is either water, or so close to water as to make no difference. Beer has a density of 1010 g/l. Milk’s about 1030 g/l. Wine’s around 970 g/l. If you assume everything in your kitchen that’s substantially composed of water has a density identical to water, you’ll get volume measurements at least as accurate as you’d get out of a measuring jug. (And if you need to measure other stuff, there’s a good chart of densities of common liquids available online).
Advantages? Numerous. Make up stock from a stock cube by pouring hot water onto the cube in a jug on the scales. Get a precise 3⁄1 or 4⁄1 ratio for vinaigrette (and then test, and reproduce, as above!). Only heat as much water as you need to.
h2. Diets and portion sizes
I’ll be honest - I hadn’t thought of this one until I did a bit of Googling. But it makes perfect sense. Want to control your portion sizes for weightloss, muscle-building, or just making sure you and your friends get the same amount of the roast beef you’ve just cooked? Enter the scales.
Again, you could do this using volume, or marked supermarket weights and some guesswork, but scales make it easier - and make it possible to accurately predict how many calories you’ll get out of that portion of pasta (which you ain’t volume measuring without getting Archimedian on its ass) or that hand-cut slice of bread.
h2. Baking.
It’s science for hungry people.
**Anything I’ve forgotten? Any other reasons to love the humble scale? **
Read more →
I really like the idea of coffee pods. For those of you who haven’t run across the things, they’re basically an attempt to make coffee as easy as humanly possible - they produce something between expresso and filter coffee on a mug-by-mug basis in about 15 seconds, using closed, easy-to-dispose “pods” with coffee inside.
Particularly for social situations, the ability to knock out cups of varying types, strengths and flavours of coffee, and even tea, quickly and easily sounds damn good. And let’s face it, producing good coffee’s a bit of a hassle - I’d estimate my morning mug of coffee takes 10 minutes, between preheating, grinding, boiling, waiting, measuring and steeping.
Now, that’s not a problem for me, because I’m extremely sensitive to stimulants, and more than one cup of coffee inside six hours puts me straight into a gibbering twitching government drugs-are-bad-mkay American Psycho state. So I have my little ritual in the morning and my damn fine cup of coffee. On the other hand, if I was running an office on six cups a day, and making for the rest of the office every time, that really wouldn’t be sustainable.
So, as I say, enter the pods.
h1. Too Long, Didn’t Read: the Coffee Pod Summary
They’re very convenient indeed, and work particularly well brought into the workplace to replace shitty office coffee.
The taste is somewhere between “foul” and “pretty good”, heavily affected by whether you buy the “official” pods (shonky) or ones from third-party suppliers (links below).
The Nestle Nespresso is generally considered to produce average to half-decent coffee (much better than the average office dispenser) but is very expensive and ties you to Nestle (who, as pointed out in the comments on our Fair Trade Chocolate article, are really not very nice people.)
If convenience is very important or quality isn’t, they’re the win. Particularly good for an office setting.
Otherwise, get a cafetière /cafetières instead.
h1. What’s Out There?
There are a whole bunch of different pod systems and sizes out there, and they’d take more than the length of this article to go into. Thankfully, there are also several excellent dedicated sites focussing on pod machines - if you;re looking at getting one of these machines, I’d recommend a trip to http://www.singleservecoffee.com/ and their forums at http://www.singleservecoffeeforums.com/.
The question of what the best machine is seems to be nearly impossible to answer. Singleserve coffee.com have rounded up their reviews and some of their recommendations, but even that recommends 4 different machines.
Of course, the range of beans is one of the make-or-break factors. The general rule, from Coffeegeek.com and elsewhere on the ‘net, seems to be that the brand-name beans from the machine manufacturers vary between average and awful, but that third-party suppliers (a number of posters mentioned http://www.bettercoffee.com ) produce coffee that, whilst it doesn’t hit the heights of really well-prepared fresh-ground coffee, is pretty damn good. One poster on CoffeeGeek said “Nobody’s going to mistake this for fine French press coffee, granted, but after the Senseo and Yuban attempts, it’s a revelation”.
The Nespresso system belongs slightly in a category of its own. It uses a different pod technology to the other systems, aggressively guarded by patents (indeed, according to Wikipedia, they’re suing one manufacturer of compatible cartridges right now . The pods are very expensive (about 50p each) but are generally considered to be of reasonably decent quality (see below).
h1. Do pod coffee machines produce good coffee?
Depends on what you mean by good coffee. One poster on Metafilter, talking about the Nespresso machines, said “Honestly, they probably produce better espresso than a many people with home espresso machines that don’t clean them properly or don’t have a decent burr grinder, and the patience to dial it in. “
In general, if your coffee palate’s particularly refined, they’re not going to perfectly satisfy. However, many of the awful reviews given to pod machines on sites like CoffeeGeek seem to have been using the default manufacturer’s coffee pods - Senseo pods came in for a particularly thorough kicking, both for lack of quality and lack of range. By contrast, third-party pods offer much more of the range serious coffee afficionados would expect - BetterCoffee offers a few hundred options compared to the dozen or so offered by most machine manufacturers.
Overall, the answer seems to be “satisfactory”, but very much dependant on individual preferences. See the range of reviews for the Phillips Senseo , for example, which vary from “If you’re desperate enought to call this swill coffee, you’d better switch to another beverage.”, through cautious optimism (I’d recommend this review) in particular for a balanced overview) to “Great price, great coffee”.
The Nespresso, again, appears to be a special case. All of the serious coffee connosieur reviews seem to converge on “pretty good, but not as good as an espresso pulled by someone who knows what they’re doing”. Given the relative levels of effort involved, that’s pretty high praise.
h1. Any hacks we should know about?
As you’d expect from a rather cool and complex system exposed to the Internet, there’s a lot of discussion about hacking and improving the darn things.
Most notably:
You can make your own pods for the machines half a dozen different ways, the most convenient of which seems to be the Perfect Pod Machine . Potentially useful, again, for an office setting.
The pods also make very convenient storage mechanisms for coffee for the Aeropress - as one CoffeeGeek user reports
There are a fair number of minor optimisations it’s possible to make to the coffee-making process with a pod - with most pods, one of the most important tips seems to be to pre-wet the pod with hot water before inserting it into the machine.
h1. Any experience?
All of this is from my research, of course. I’ve not used one of the things extensively myself.
Have you? If so, what did you think?
Read more →
I’ve been on a bit of a coffee mission in the last few months, ever since discovering the wonders of Has Bean Coffee’s subscription coffee plan. One single-estate coffee through your door every week, what’s not to like?
And as a result, I’ve been working out how to make that coffee taste as awesome as humanly possible. Now, I’m a bit old-fashioned, and grew up with a heavy francophile influence, so my preferred way of making coffee is the cafetière (“French press” for the USAians amongst us, although I’m sure there are states where it’s now officially referred to as the “Freedom Press”).
Cafetières are awesome, actually. Baristas seem to reckon they’re one of the best ways of making coffee, period, and certainly one of the top ways that doesn’t cost hundreds or thousands of pounds. They produce coffee similar to that from a filter, but less burned-tasting than filter machines often produce, and with a real complexity of flavour depending on how you brew.
And there’s the rub. Making coffee with a cafetiere might look simple, but there’s a LOT of optimisation you can do…
h2. Optimise your grind
Hardcore types will already know that blade grinders, the cheapest type of coffee grinder, are fantastic for chopping chilli but sodding useless for coffee (although, IMO, if you have to use one a cafetiere brew is one of the less-horrible ways to do it). Pre-ground coffee is only of much use if you drink it within a day or so of grinding, and even then it’s nowhere near as aromatic as fresh-ground. So, one of the first stops on the coffee pilgrimage tends to be the burr grinder, with variable grind size. But here’s the rub - even burr grinders aren’t created anywhere near equal, and a bad burr grinder is particularly bad for cafetiere grinds, which need to be large and even. It turns out, you see, that cheap burr grinders can set a maximum grind size, but will randomly produce lots of finer-ground particles of coffee smaller than that grind size too, and that equals sludged-up cafetière and overbrewed coffee thanks to excessive surface area.
After screaming at the price of top-end grinders, I’ve settled for now on a Hario Skerton hand grinder. It’s a pain to figure out how to use it initially (I’ll write a guide on here at some point), and it’s certainly some fairly hard work to grind 50 grams or so of beans for four people, but it produces a very, very nice, smooth grind, and the smell when you first open it up after grinding is worth the price of admission on its own. Plus, I’ll probably study Brazilian Ju-Jitsu at some point, so the increased grip strength from using it every day ain’t going to waste…
h2. A/B testing cafetières’ brews
OK, let’s start simple. Get a set of scales with a 1 gram sensitivity. Better than that would be great, but they need to be able to handle a maximum weight of 2 kg or so, and most microgram scales can’t cut that, at least not on a non-lab budget. (Please do tell me if I’m missing a brand here - I’d love to get a set of microgram scales with a wide weight range).
Why do you need scales? Because the single biggest optimisation I’ve been able to make to my cafetière coffee has been precise weight measurement, both of the beans and the water. Measuring by volume works very, very badly for coffee - the ground beans froth varying amounts, the volume can be widely different dependant on the grind size, there are all the usual problems of volume compared to reasonably large eliptical objects. Get a set of scales in play and you can get granular on the problem. So to speak.
Now, there are four variables in the process. People who design websites, ads, software or Toyota cars for a living will be starting to make a matrix in their head already.
Temperature. Coffee is brewed somewhere in the 88-93 degree centigrade ( 190F to 200F ) range, but there’s not a lot of agreement beyond that as to what the ideal temperature is. (Yeah, I know I said 93 in the electric kettle article. But, as usual, it’s more complicated than that, much like finding a bloody yellow kettle turned out to be - true story.)
Brew time. Artisan Coffee in Edinburgh say 3 minutes, Square Mile Coffee say 4 minutes. My experience is that 3 minutes produces a more fruity, acidic brew, and 4 minutes produces a richer, heavier, and more caffinated brew.
Amount of coffee. Again, not a lot of agreement here. Somewhere between 5 grams and 8 grams per 100ml works well, with 8 grams working for heavier, smoother beans, and 5 grams working well for the lighter and fruitier, although it can sometimes produce a smooth brew too.
The bean. Different beans respond different ways to different approaches. A Kenyan Gethumbwhini will work well with a 4 min/7g/l combination, wheras the El Salvador Finca Argentina (a fantastic bean from this week’s subscription) seems to respond better to 5g/l / 4min.
So what do you do? Well, there’s a variety of approaches you could take. At the hardcore end, I’d recommend half a dozen small cafetieres, a big pile of ground beans, a matrix table, and some serious tasting. (I keep meaning to organise this in Edinburgh). You might want to Google “A/B testing”. At the lighter end, just vary your brew between the extremes every time you make a morning cuppa, and keep notes (that’s what I’m doing normally).
(Anyone got a systematised way for optimal testing of this sort of thing? My maths ain’t up to it.)
Either way, the important thing to remember is that each bean responds totally differently. So don’t assume a brew method for one bean will result in a good brew with another - I’ve had one bean which actually tasted plastic if given a long, high-density brew, but was fantastic at a much lighter brew.
h2. All cafetières are not created equal
For starters, there’s the temperature drop-off through the side - whilst the classic cafetiere is made of glass, that means that it’ll lose heat really quickly, meaning that the optimal extraction temperature drops off. (Hmm, we should really do some taste testing on this - watch this space.). There are a couple of ways to mitigate that - remember to pre-heat the cafetiere, for starters, as it really does make a difference. Wrap the cafetiere in something insulating, like a towel or some foam. And if you really want to get hard-core, you could immerse the cafetiere in hot water, or even water heated to exactly the right temperature in a water bath. (Again, must try that.)
Your best option for convenience and quality is probably to buy a double-walled cafetiere, though. Sadly Square Mile seem to have stopped selling their excellent-looking silver ones, but Amazon have a fair selection. They’ll hold heat like a thermos flask, meaning you get a much, much better brew.
The other variable, of course, is shape. As Mathias pointed out in the kettle article, the shape and material of a brewing vessel has a hell of an effect on the brew. In general, bigger, wider vessels should ensure greater extraction in less time, and they’ll also lose less heat to boot (volume and hence heat energy goes up as a cube whilst surface area only goes up as a square.). Having said that, the press will also work better the higher up the cafetière the coffee starts, so balance is important.
And that’s about it. Any other cafetiere tips out there?
Read more →
Preparing more content here, and looking at more ways of doing it, and I need a bit of help from you guys.
What I could really do with is the answer to this question:
What would you most like to know about cooking right now?
What’s really kicking your arse? What problem would it be infinitely better if it was solved?
What’s the thing you most want a solution to, food-wise?
Read more →